


From your car to patio chairs, metal surfaces are all around you. Most of the surfaces age quickly, requiring rust removal and painting from time to time. However, the success of any such remodeling relies on just how well you’ve prepared the surface.
Sanding metal and removing rust before finishing is one of the best ways to make sure your high-quality paints and custom coatings will last. This article will cover all the best tips for sanding metal surfaces, including your car and common metal surfaces around the home. You’ll learn about the best materials to use and more.
How To Sand Down Metal for Painting – DIY / Home Jobs
Below is a look at how you can sand down metal in various DIY applications.
Sanding Railings and Metal Fences
Metal fences and railings are two surfaces around the home that rust easily. Prepping the surfaces will help you get rid of the rust, and increase your chances of getting sustainable and long-lasting results after the finish.
Some of the tools you’ll need when sanding railings and metal fences include an angle grinder, a wire wheel, a wire brush, and a corded drill.
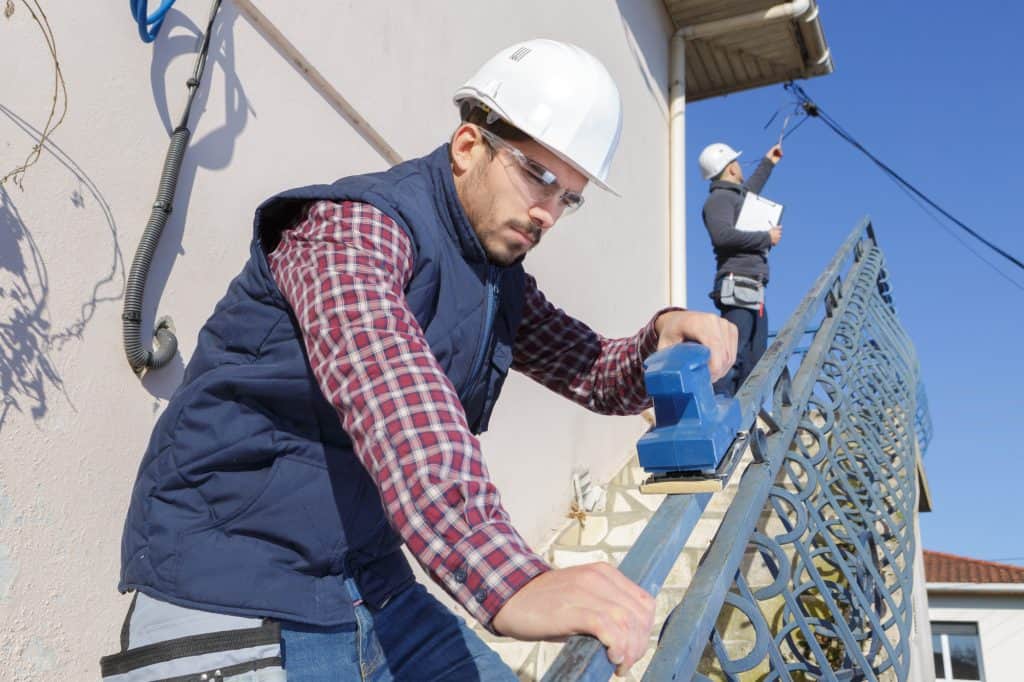
If you’re preparing railings and metal fences that contain rust for painting, the first step is to clean off any loose rust and flaking. Use a wire brush to scrub the affected areas and remove the flakes.
With the dust cleared, the next step is to use a drill with a wire wheel to grind down the surface. An orbital sander with coarse-grit sandpaper will also get the job done.
However, if some parts of the railings or fence are too detailed to sand down properly, it may be best to use a product like Rust-Oleum Rust Reformer, which is made to be used on small patches of rust. The material will soak into the rust, giving you a non-rusting paintable surface.
Sanding Garage Doors
Sanding metal garage doors is a bit less challenging because of the wider surface area. However, you still need to do the job correctly to ensure your finish will go on quickly and hold up nicely over time. The first step in the sanding process is to remove all rusted or chipped spots by scrubbing with a wire brush (Source: Bob Vila).
With the rust removed, start sanding with medium-grit sandpaper to get rid of any remaining rust, caked dirt, and grime. Give the garage door a smooth base with another round of sanding.
With the sanding done, the next step is to clean the surface with a sponge and a general-purpose cleaner to get rid of all dirt and grime. Rinse out the surface using your garden hose and dry with clean rags.
Allow the garage door to dry for an hour before you proceed with the rest of the painting process.
Sanding Metal Furniture
Sanding metal furniture such as patio chairs, bed frames, metal dressers can be a bit more challenging due to the intricate designs that are typically built into them. Nevertheless, the sanding process is generally similar to what you’d do on other metal surfaces.
Prepare the surface by scraping it with a wire brush to get rid of loose rust (Source: DIY Network). Wire brushing may be ineffective for rust nestled between designs, but you don’t need to spend too much time on this stage. Get out as much rust and dirt as you can and move on to the sanding stage.
For surfaces that will allow it, a palm sander is always the best for sanding metal furniture. For tighter corners you can’t reach with the sander (including furniture arms, legs, backrest designs, etc.), you can sand by hand. The initial sanding should be done with 200- to 220-grit sandpaper to remove as much materials as possible.
With most of the rust and dirt on the furniture sanded down, switch to 400-grit sandpaper or higher and continue sanding to achieve a smooth appearance.
You may still see some rust at this stage, but that’s fine as long as you’ve achieved a smooth surface. Clean the furniture with a solvent such as acetone, and it is ready for painting and priming.
Don’t forget to wear protective covering and employ safe practices when you’re sanding metal either by hand or with tools like orbital sanders or a Dremel. With an orbital sander, change the sandpaper as soon as it starts to wear down. This will be frequent, even when using high-quality metal sandpapers.
A Dremel is another solution for hard-to-reach corners when sanding metal. Set it at around level 8-10, which is optimal for sanding such touch surfaces (source: Wiki How). Ensure the sanding bits on the Dremel are in good shape, or you risk leaving deep marks on the metal surface.
The bits also have to fit tightly in the drill. Just as with sandpaper, you need to have a few sanding bits on hand so you can replace them as soon as necessary. You should check the bits every few minutes while working to ensure they are not worn or torn. Don’t forget to turn off the machine before doing this.
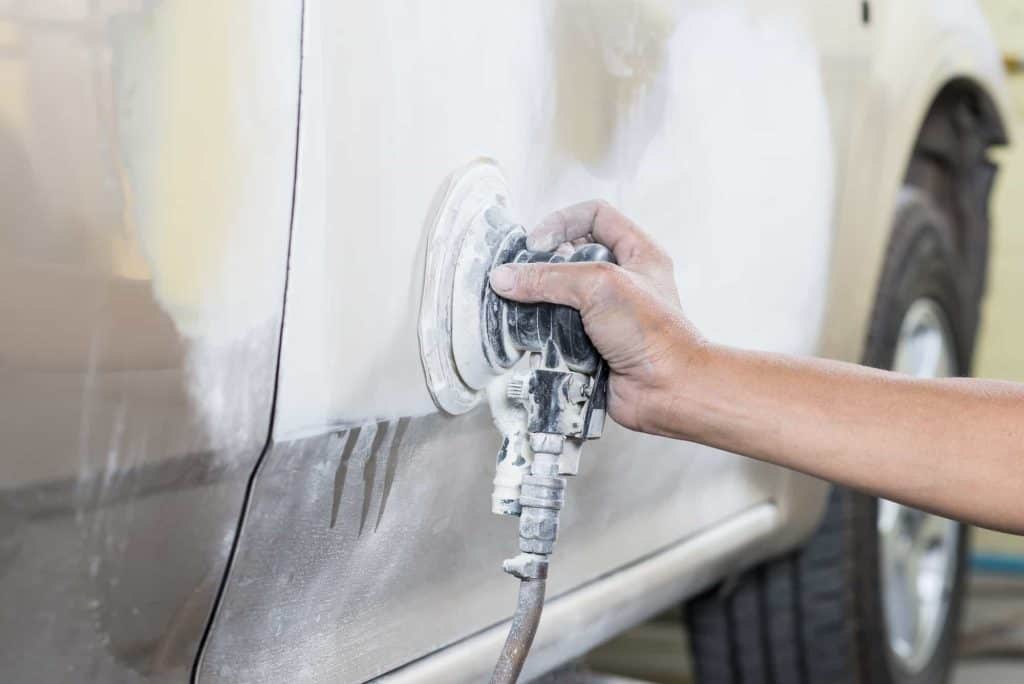
How To Sand a Car Down To Bare Metal
Sanding down a car to bare metal is a laborious process that can take a while to accomplish, but with some patience, you can get a surface that will take your car paint perfectly. Before sanding a car down to the bare metal, you need to gather your protective gear.
The dust from the sanding process can be harmful, so you need to protect yourself with gloves, safety glasses, a dust mask, and an apron. You may also need earmuffs if you’re using a dual-action (DA) sander.
With the protective gear secured, order a supply of sandpapers meant for car bodywork and your DA sander. Once you’ve assembled everything, you’re ready for the job. Start with not-too-fine grit sandpaper at the beginning. You should ideally go with 200- to 220-grit options.
If you’re using a sanding block instead of a DA sander, wrap the sandpaper around the block and apply pressure in circular motions to remove material. You should start to see the bare metal with a few runs.
After sanding with the 200-220-grit sandpaper, wipe down the surface with a microfiber cloth or dry towel and proceed to the next stage of sanding, which is with finer grit sandpaper. Use at least double the grit used on the original sanding, so a minimum of 400-grit sandpaper (Source: Solve Sonic).
After going over the surface a second time, clean again. The cleaning at this stage should be done with soap and water instead of just a clean rag.
If you notice any imperfections on the car body that you can repair with body filler, get that out of the way before cleaning. For minor imperfections, glazing putties can also get the job done. With the holes filled and surfaced cleaned, the surface is ready for the next stage of your refinishing project.
How To Sand Rust off Metal & What To Use Before Painting
If you’re looking to sand rust off metal before painting, a power sander is often the go-to tool to use. A drill can also work, especially when paired with a wire wheel. Whatever tool you choose, you have to start working with a coarse abrasive to get rid of as much rust as possible (Source: Family HandyMan).
When you’re done with the coarse grit, use a finer grit to make the surface smooth while getting rid of as much remaining rust as possible. Again, you’ll need 400-grit sandpaper here.
You need to ensure the abrasive you’re using matches the metal surface you’re working on. So, an orbital sander or a fiber disc will work best for flat, open metal surfaces, while wire wheels will work best when you’re working on seams, corners, and rounded rusted metal areas.
A detail sander will also work well for rusted corners, hard-to-reach spots, and small surfaces.
Wire wheels and stripping discs mounted on a drill are also useful for removing rust. However, they won’t cover a lot of ground, so you’ll have to work for longer periods. The same applies to Dremels fitted with sanding bits. To work fast on wider and flatter surfaces, it’s best to use a finishing and random-orbit sander.
How Do You Keep Rust From Coming Back?
To reduce the chance of rust coming back to the metal surface, you need to prime and paint appropriately. Clean the sanded surface properly and apply the primer over the surface. After the primer dries off, apply a rust-inhibiting paint and round off the project with a clear gloss final top coat.
Be sure to allow enough dry time between applying the paint and spraying on the top coat. The combination of the topcoat and paint will reduce the chances of rust coming back to the barest minimum.
Tips on How To Sand Metal Smooth / Flat
To sand metal smooth or flat, here’s what you should do:
- Start with a coarse sanding disk. A 220-grit option can work, but you can go a bit lower if necessary to get rid of all the layers of rust, paint, and scratches.
- Sand slowly when using such coarse grit sandpaper to avoid chipping away at the surface too tightly and weakening the material.
- Switch to a finer grit of sandpaper after removing the top layer of old material and paint. A 400- or 500-grit sanding disk will get the surface smooth and clean without eating into the surface.
- Reach manually into tight spaces with a sandpaper sheet to get rid of paint, rust, and ridges. Start with a coarse grit paper, and gradually move to a smoother one.
- At this stage, the metal should look smooth and flat. If you’re still not satisfied with the overall look, you can use a ball of steel wool on the surface by rubbing it in circles to get it looking more polished.
You can complete this process either with a power sander or manually with some sandpaper sheet. However, the latter is more difficult and will invariably take longer.
How To Sand Metal Edges
To sand metal edges, the first step is to secure the piece. When working on heavy surfaces, this is rarely a problem as the object will likely remain static even under sanding pressure. However, for smaller pieces like metal furniture, you need to stabilize the piece by securing it tightly in a clamp (Source: Ehow).
Once the material is secured, use 220-grit sandpaper on a power sander to remove the largest burrs around the edges. A half-round file or a metal file can also get the job done. Move the sander or file in one direction only.
Continue the process until all the large burrs have been appropriately removed. For hard-to-reach corners, you can work with needle files.
After the initial burr removal, switch to a 500-grit or higher sandpaper to smooth the edges of the metal. Maintain light strokes throughout the process. Once the edges are smooth, use a polishing pad to remove any metal dust and give the surface a shine.

Does Sandpaper Work on Metal, or Should I Use a Dremel To Sand Metal?
Sandpaper works on metal, as long as you choose the right grit for the project. The best type of sandpaper to use when removing rust on metal is a 220-grit variant at the barest minimum (source: SF Gate).
The 220-grit should serve as your coarse grit, unlike in wood sanding, where you can go as low as 40-grit. For the smoothest surface, you should use fine-grit sandpaper between 400 and 1,200 grit to achieve a smooth surface.
In comparison to a tool like a Dremel, sandpaper is easier to work with. The smaller Dremel tip has to be fit with sanding bits before you can use it, plus, it will take longer when you’re sanding a wide metal surface.
Can You Sand Metal Without Sandpaper? How?
You can sand metal without sandpaper. Some of the options available to you include the following:
Emery Cloth
This material looks a lot like sandpaper, but instead of paper backing, it has a cloth backing. This makes it very durable. The grit on the front is often made of a combination of minerals like hematite, magnetite, corundum, and others.
However, these are costlier than sandpaper as they are sold in sheets, bands, or rolls. The band variants are used for commercial belt sanders.
Steel Wool
Steel wool is useful for getting rid of rust from metal or applying the final finish on a metal surface. You can find steel wool in different grit grades, from extremely fine to coarse.
Stone Sharpening Tools and Grinding Wheels
Water stones, whetstones, and oil stones can all be used as sandpaper. Applying water or oil to the stone makes for easy removal of metal filings. Grinding wheels are designed for deburring, smoothening, and shaping metals, so they can also work for metal sanding.